
🛡️🛡️ iFlowGo Virtual GO Plus 100% Safe
Virtual GO Plus is just as safe as iFlowGo’s location spoofing — 100% safe. It never modifies or injects anything into the official Pokémon GO app, no jailbreak required, and your account stays protected.
✨ What is Virtual GO Plus?
Virtual GO Plus is iFlowGo’s built-in virtual GO Plus feature, working exactly like the real hardware GO Plus device. It auto-detects nearby Pokémon, auto-catches them, and auto-spins PokéStops, letting you level up and grind XP even while AFK.
Even better:
- 🔋 Connect up to 3 iPhones at once from a single computer — spoof location and run GO Plus on all of them simultaneously
- 💰 Completely free, no need to buy a real GO Plus / GO Plus + device
- 🚫 No worrying about losing the hardware, battery dying, or Bluetooth range limits
Compared to buying a physical GO Plus that only pairs with one phone, using iFlowGo to manage multiple iPhones from one computer is way more efficient and way more bang for your buck.
⚠️ Before You Start
Make sure you’re already comfortable using iFlowGo to change your location. Virtual GO Plus builds on top of basic location spoofing — get familiar with that first, and GO Plus will be a lot smoother (and more fun) to use.
Not comfortable with location spoofing yet? Check out this guide first: iFlowGo Mac Location Spoofing Tutorial, then come back once you’ve got the hang of it.
Important: Follow the steps below in order. Skipping steps or doing them out of order is the #1 reason people run into connection issues.
Step 1: Rename Your Computer
When you open Virtual GO Plus, you’ll be prompted to rename your computer to a specific name so your iPhone’s Pokémon GO app can detect it.
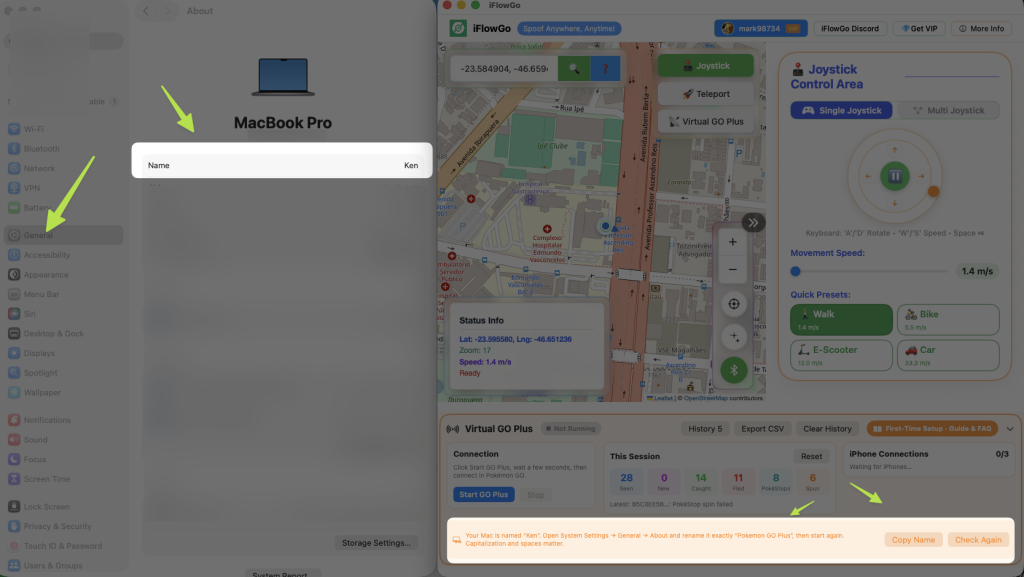
- Click Copy Name to copy the exact text we provide
- Go to Mac System Settings → General → About, paste it into the “Name” field, and set it to Pokemon GO Plus
- Click Check Again to confirm
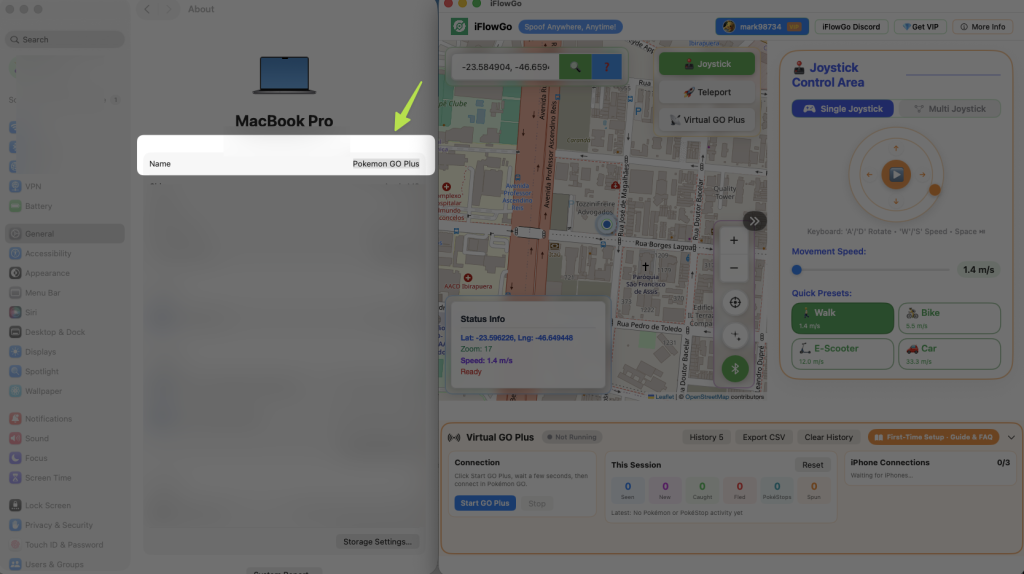
🔴 Don’t type this name manually! Even one wrong character or extra space will stop your iPhone from detecting the device. Always copy and paste.
Step 2: “Forget” the Bluetooth Device on Both Sides
⚠️ This step is critical — it’s where most people get stuck.
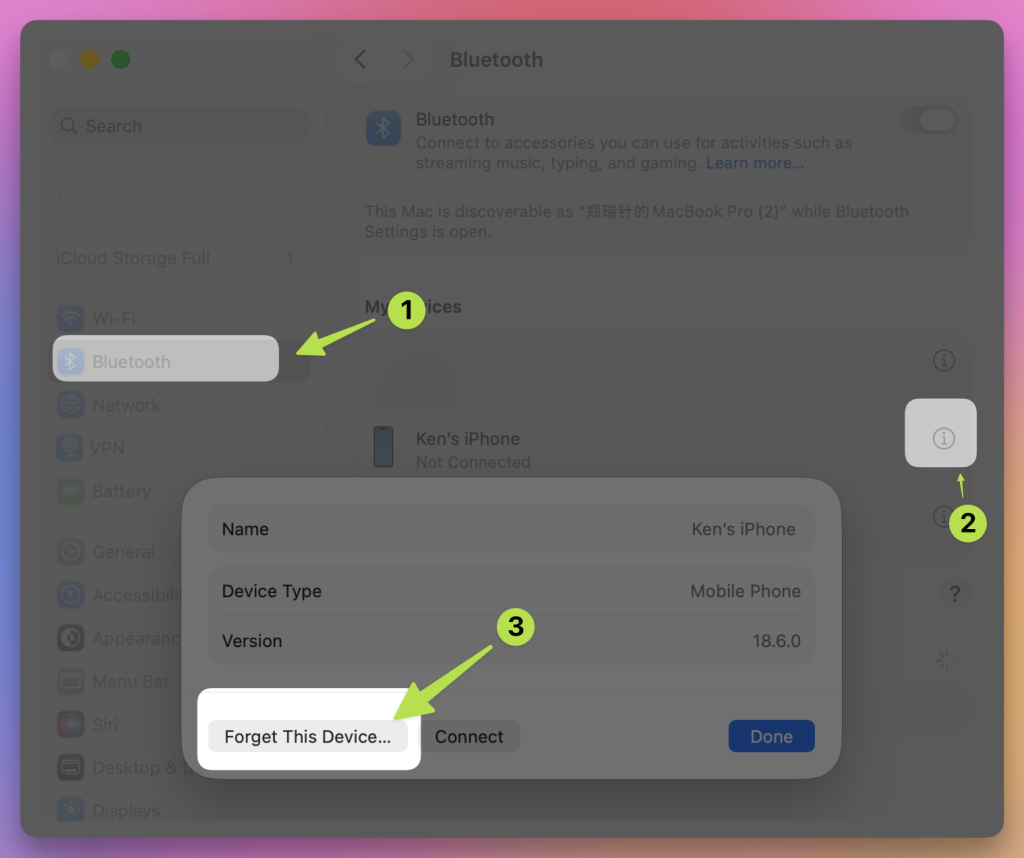
On both your Mac and your iPhone, you need to remove (forget) the paired device on the other side:
- Mac: System Settings → Bluetooth → find your iPhone → click ⓘ → Forget This Device
- iPhone: Settings → Bluetooth → find your Mac → tap ⓘ → Forget This Device
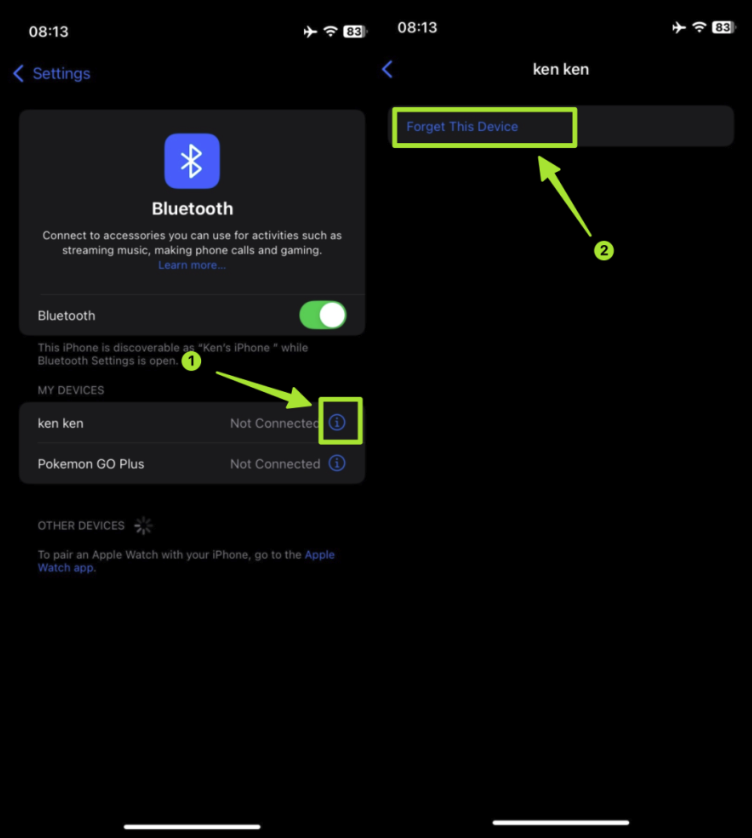
🔴 You have to forget it on BOTH devices — no exceptions. If you only forget it on one side, the pairing confirmation prompt won’t show up later.
❓ Why does this matter? Bluetooth addresses get cached. If you don’t forget the device first, your system will still remember your computer’s old Bluetooth name instead of “Pokemon GO Plus.” Forgetting and re-pairing is what forces the name to refresh properly.
Step 3: Re-Pair Through iFlowGo
⚠️ Important: Pairing has to happen through iFlowGo’s scan feature, NOT through your Mac’s system Bluetooth settings — otherwise pairing will fail!
- In iFlowGo, click the Bluetooth icon → Scan Devices
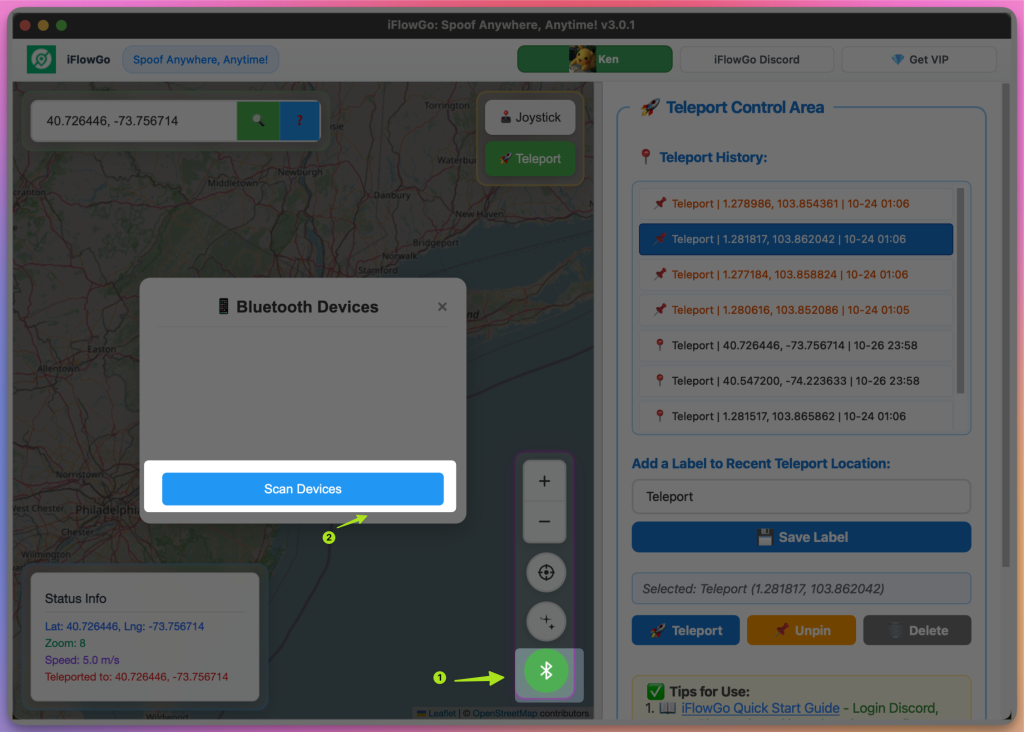
- Once your iPhone shows up, click to pair
- A confirmation code will pop up on both your Mac and iPhone — check that the numbers match, then click Connect / Pair on both
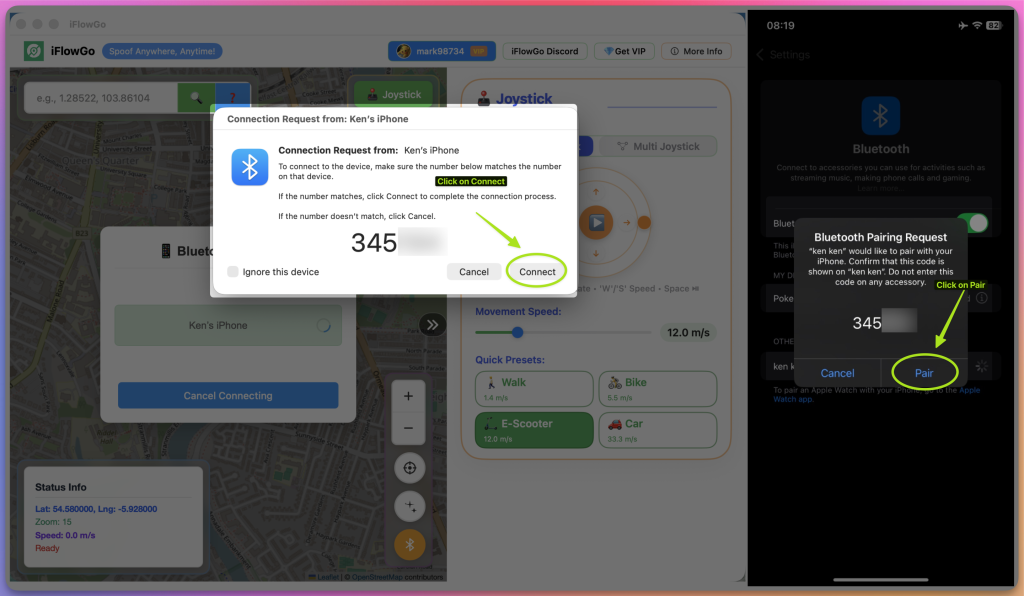
✅ Once paired, you should be able to spoof your location over Bluetooth (small-range movement).
Step 4: Connect to Pokémon GO Plus
Once pairing is done, you’re ready to actually connect GO Plus:
- In iFlowGo, click Start GO Plus — this makes your Mac start broadcasting over Bluetooth so your phone can detect it
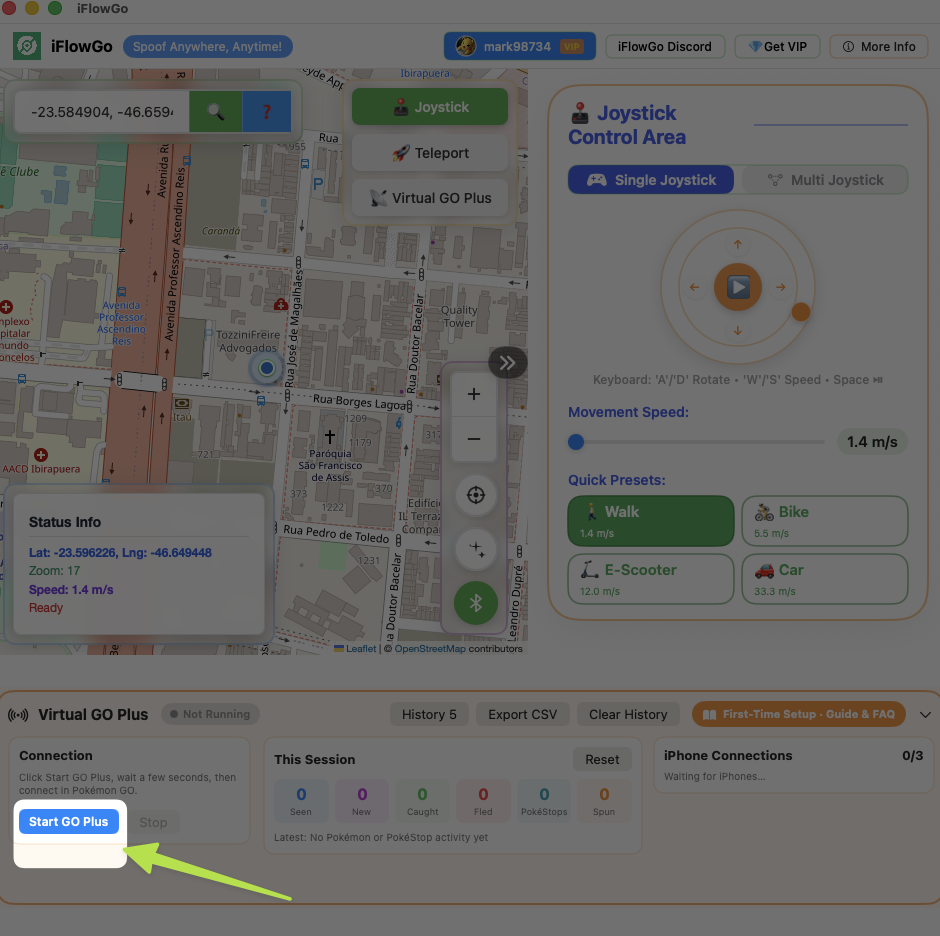
- Wait a few seconds until the status shows Ready to Connect, then open Pokémon GO on your iPhone
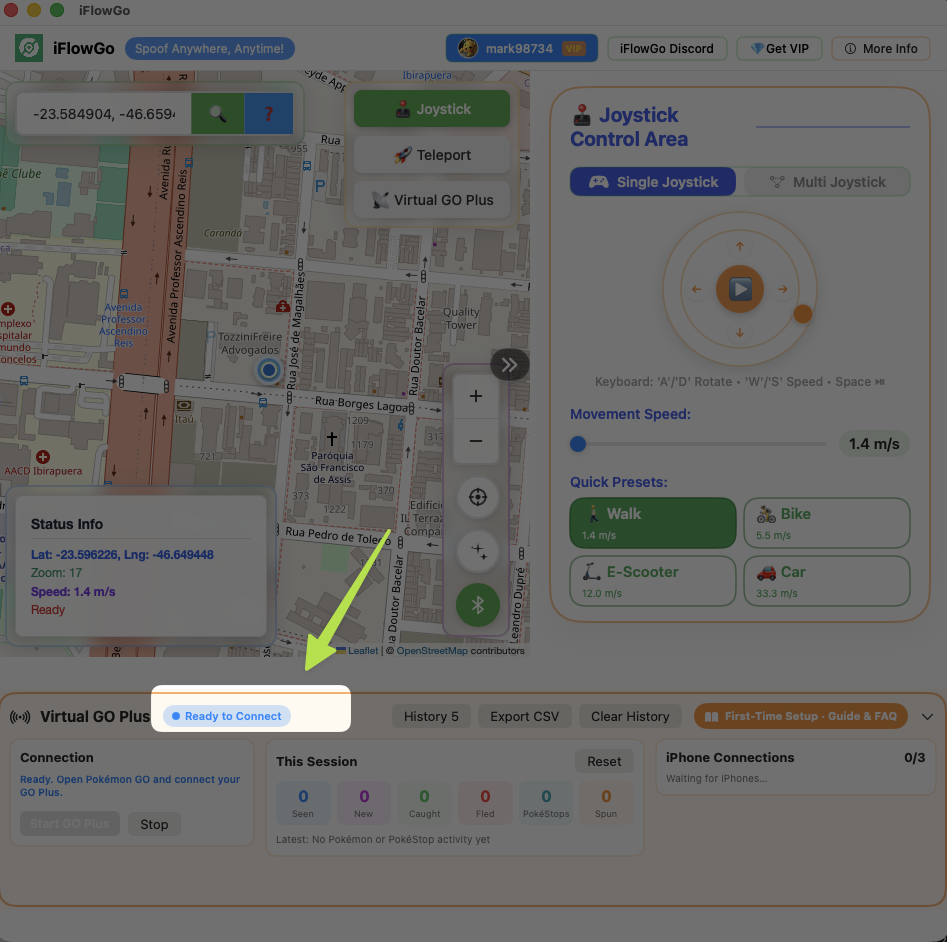
- On your iPhone, go to Settings → Accessory Devices
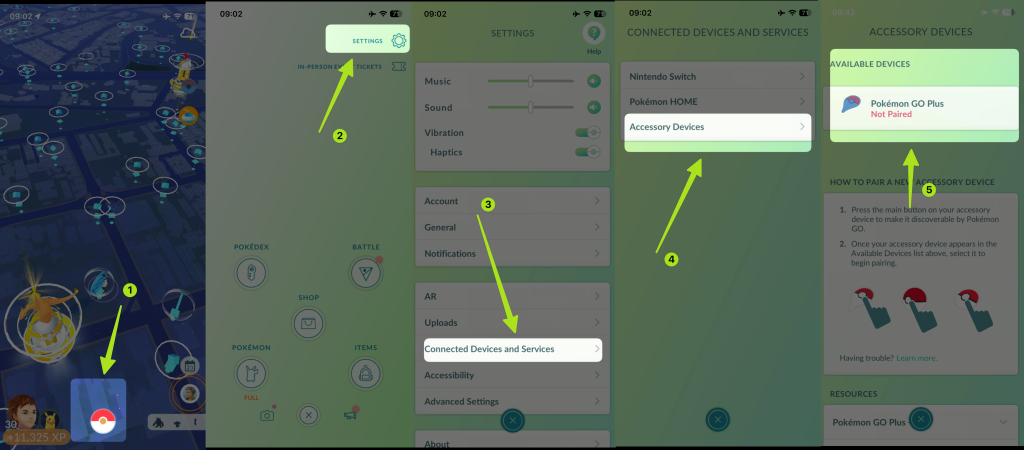
The first time you open this screen, you’ll see one of three things:
| Status | What It Means |
|---|---|
| ✅ Pokemon GO Plus – Not Paired | Normal — everything before this step was done correctly. Continue below. |
| ⚠️ No devices found | Stay on this screen for a few seconds, then back out and go back in. If it still doesn’t show up after a few tries, close and reopen the Pokémon GO app. |
| 🔄 Disconnected | This means you’ve connected a real GO Plus device before. Tap Disconnected to forget it, then it’ll detect the new virtual GO Plus. |
- Tap Pokémon GO Plus in the list and wait for pairing to finish — then you’ll see this.
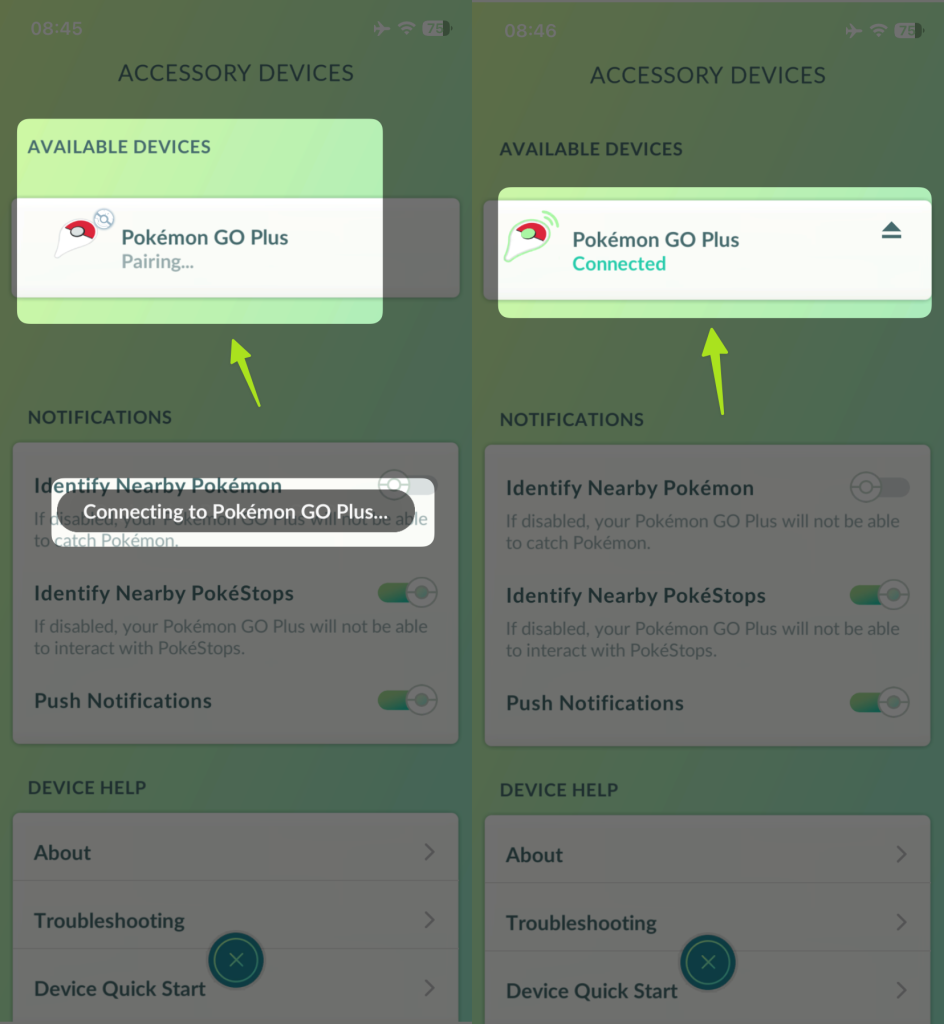
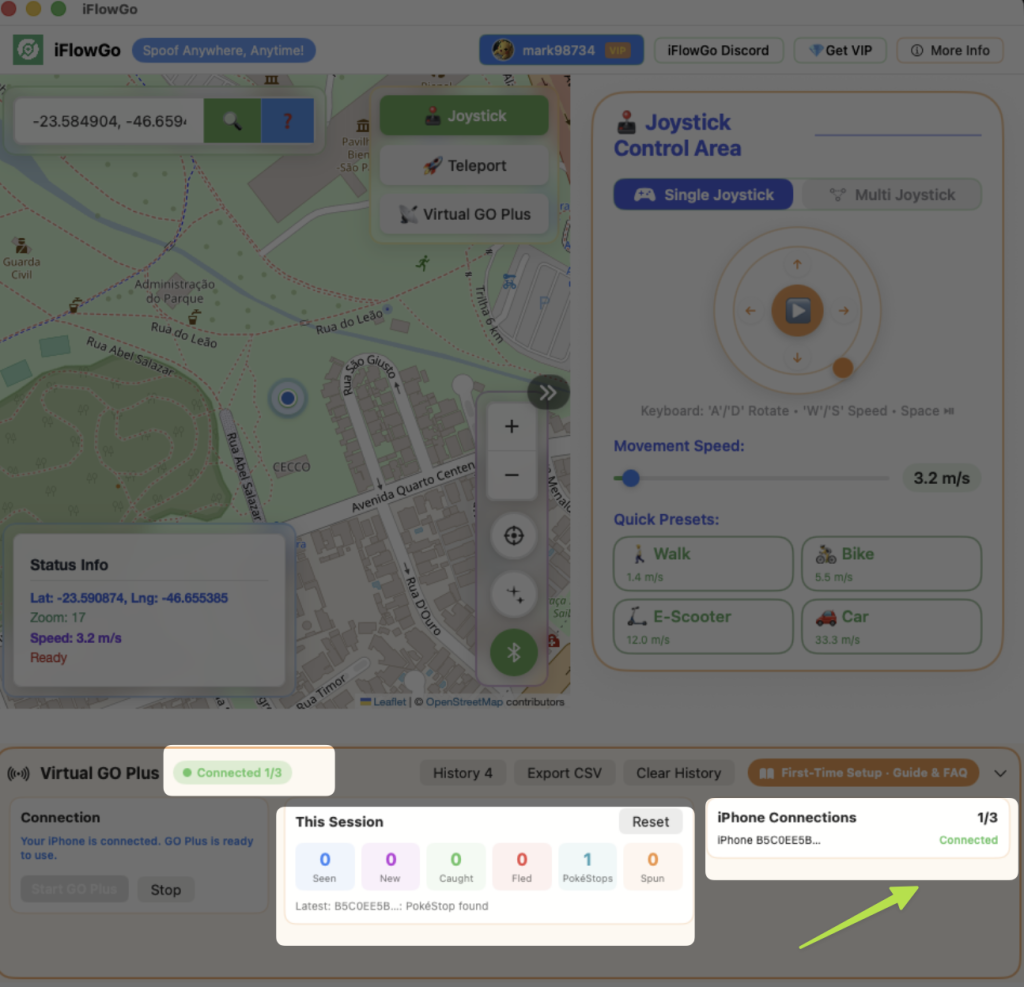
- Once it shows Connected, it’ll start auto-catching Pokémon and auto-spinning PokéStops 🎉 — you’ll then see the catch and spin data populating in the This Session panel.
✅ Using It Going Forward (Pair Once, Use Forever)
You only need to pair once — this was just to clear the Bluetooth cache.
As long as you don’t change your computer’s name (keep it as “Pokemon GO Plus”) and don’t forget the Bluetooth pairing again, every time after this you just need to:
- Open iFlowGo → click Start GO Plus, wait a few seconds until it shows Ready to Connect
- On your phone, tap Pokémon GO Plus to connect
No need to rename anything or forget devices again — just connect and go. Sit back and let it auto-catch Pokémon and auto-spin stops while you level up fast 🚀